It was quite easy ! Building a private blockchain using Hyperledger Fabric looked relatively simple when I tried building a couple of demos (similar to my Private Ethereum experience)! Lately, I don’t have the luxury of my big old machines at Oracle so I used my own free-tier account on AWS (Thank you AWS). I was able to quickly put up an Ubuntu instance with 2Gb RAM and 8Gb of storage. For doing the BYFN (Building your first network) demo (from Hyperledger Fabric Samples), I thought it should be good enough to run few docker VMs running Fabric peers representing two organizations using a Solo orderer (not using Kafka).
Putting altogether (Here is my recipe):
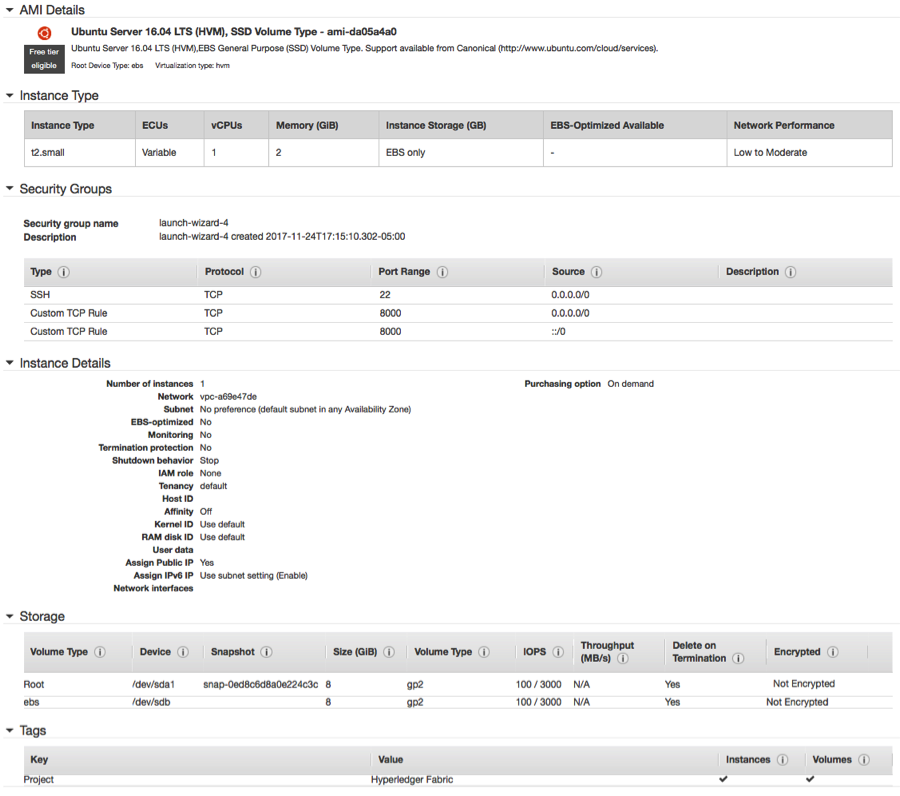
- Ubuntu instance details:
2. Before you begin installing Hyperledger, make sure your Ubuntu instance is installed with ‘curl’, ‘docker.io’ and ‘docker-compose’ binaries. To download and install the latest Hyperledger Docker VMs binaries refer to the following URL:
https://hyperledger-fabric.readthedocs.io/en/latest/samples.html#binaries
I used the following URL:
$ curl -sSL https://goo.gl/Q3YRTi | bash
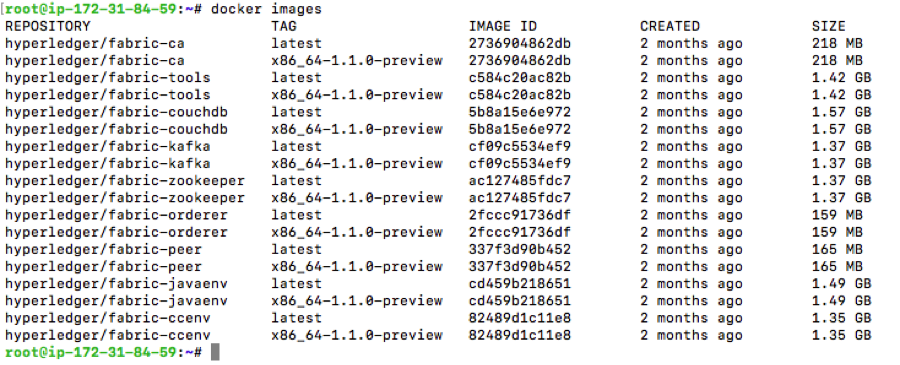
3. To verify install, try running ‘docker images’ :
Also, make sure your current directory and the ~/bin directory is added to $PATH environment variable. For example, you would add. #export PATH=/home/ubuntu/hyperledger/bin:$PATH
4. Now download the Hyperledger Fabric samples from Github, by running the following commands:
$ git clone -b master https://github.com/hyperledger/fabric-samples.git
$ cd fabric-samples
5. Now, move to the sub-directory “first-network” and run the following command:
$ cd fabric-samples/first-network
$ ./byfn -m generate
You should be seeing the following output, which will generate the Certificates for the peers, creates the Orderer genesis block, creates a single channel (mychannel) and the anchor peers representing two organization (Org1 and Org 2).

- Now, bring up your “first-network” and run the following commands:
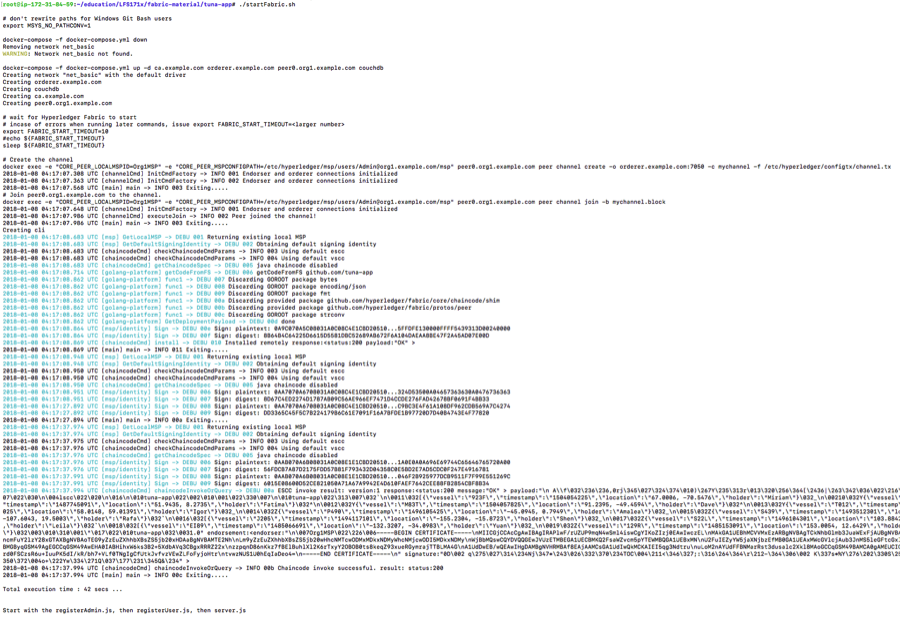
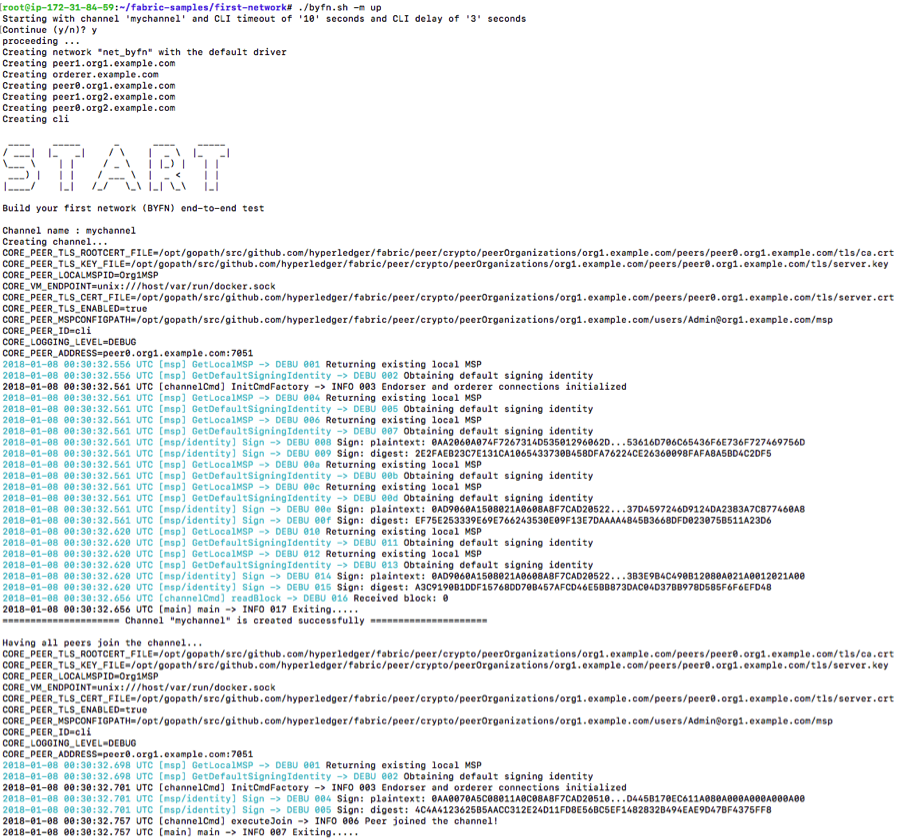
$ ./byfn.sh -m up
You should see the following output (I truncated them into multiple screenshots for ease of understanding of what is going on under the hood).
a) Creating the Orgs, Solo Orderer, Peers and the channel (mychannel)
b) Adding Peers to the Channel
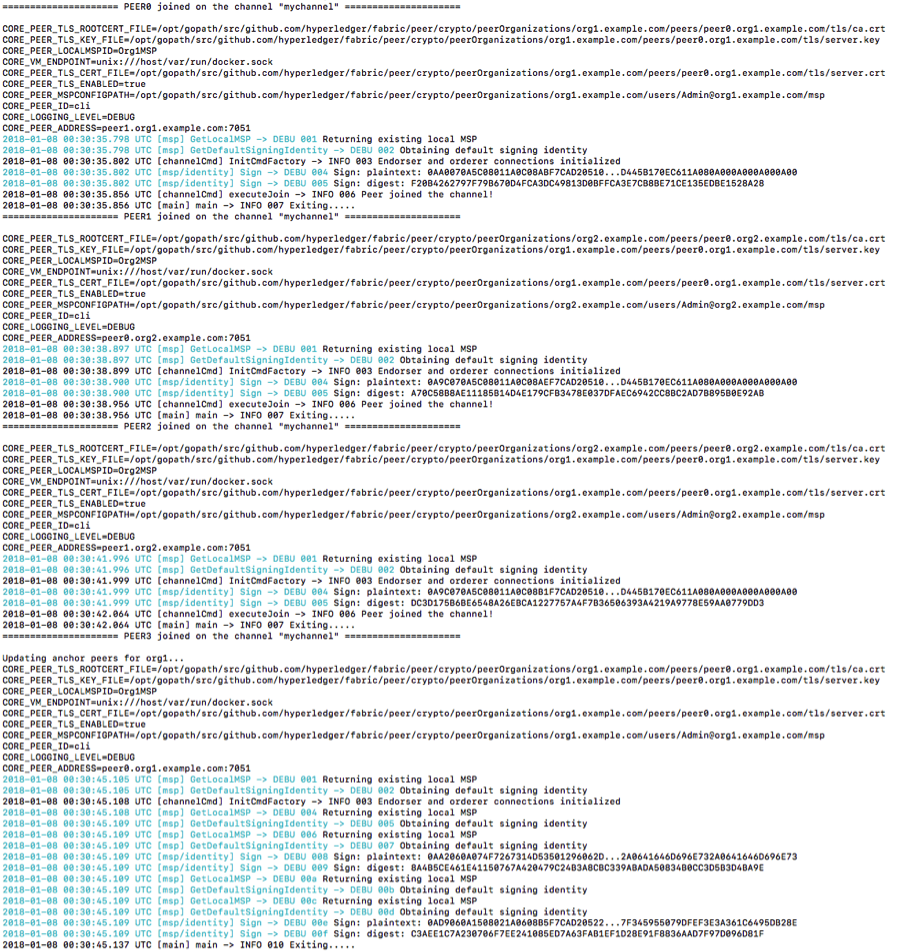
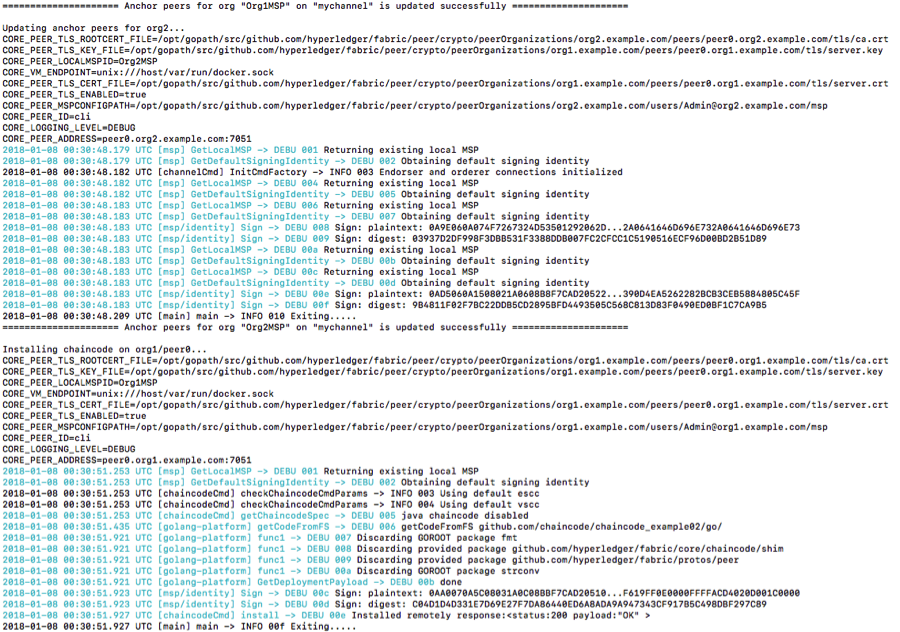
c) Identifying the Anchor peers for each org
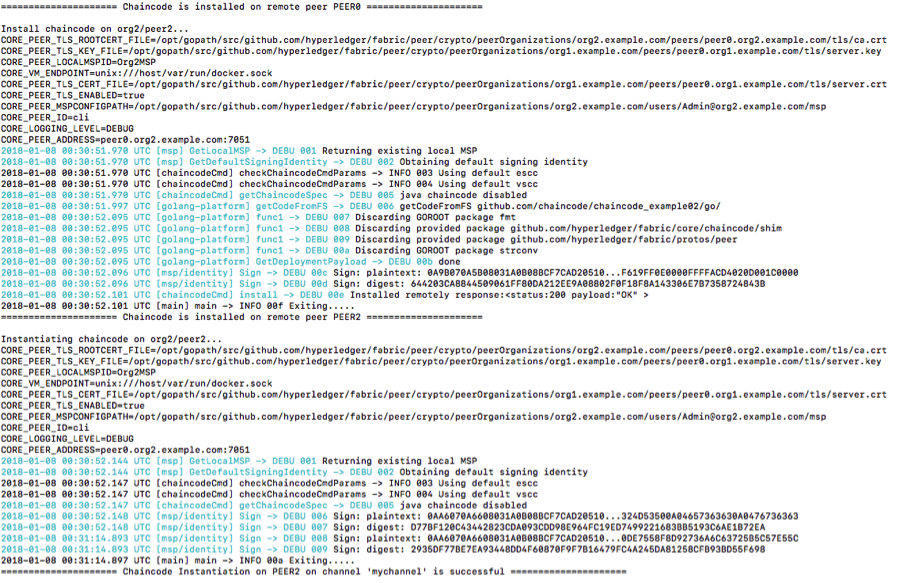
d) Installation and Instantiation of Chaincode on the peers
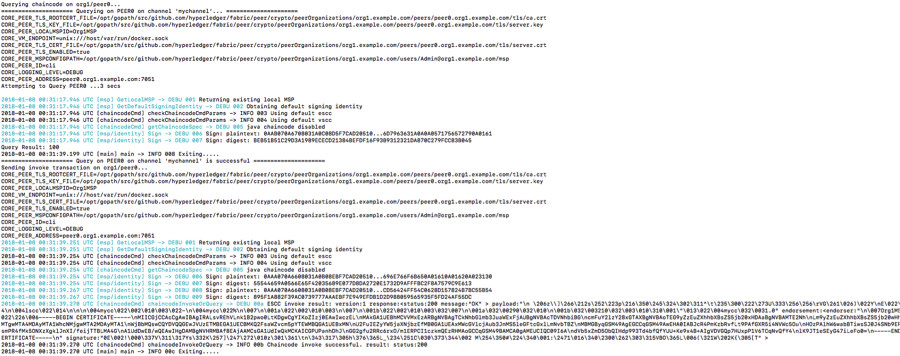
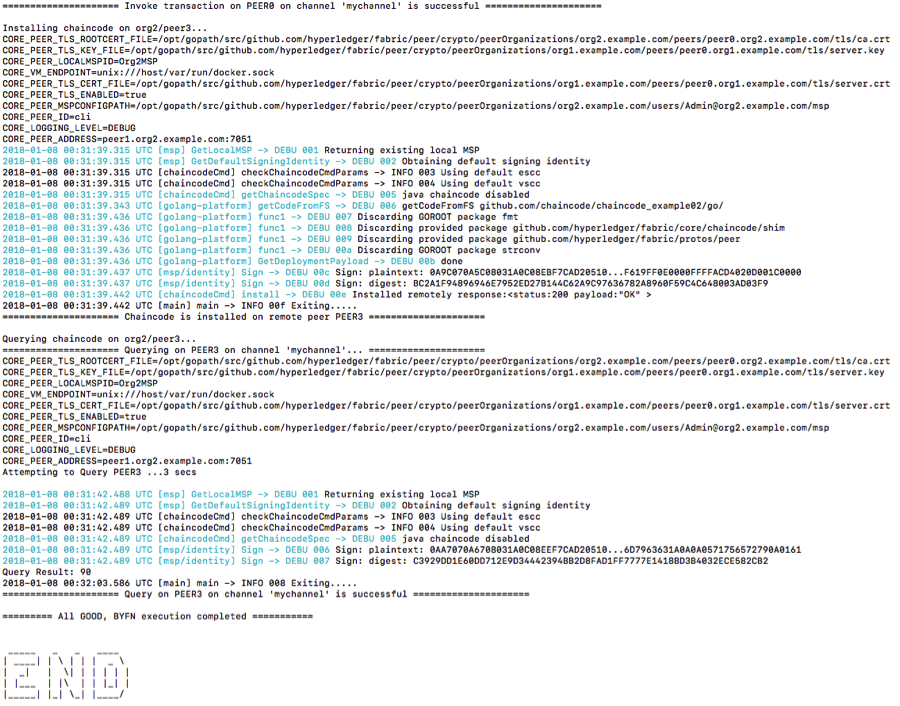
e) Querying chaincode and Invoking transactions.
7. To shutdown your “first-network” and to delete all the artifacts, including stopping the docker VMs, deleting the chaincode images from the docker Registry removing the crypto material (certs) of the peers. By running the following command:
$ ./byfn.sh -m down
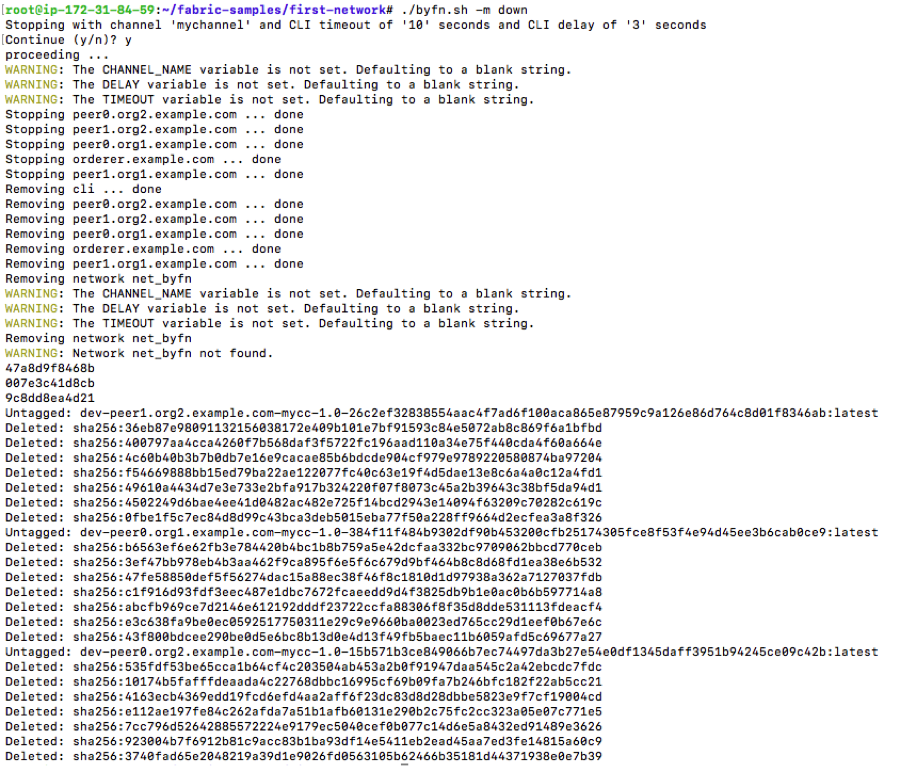
To summarize, we executed the “First Network” script, beginning with generating the certificate artifacts for the organization, created the default channel that connects the orderer with the peers, created orderer genesis block and then brought up the private blockchain network using the Solo orderer that makes use of two organizations joining peers from both organization to a channel, deploying, and instantiating the chaincode, and execute query and invoke transactions against the chaincode.
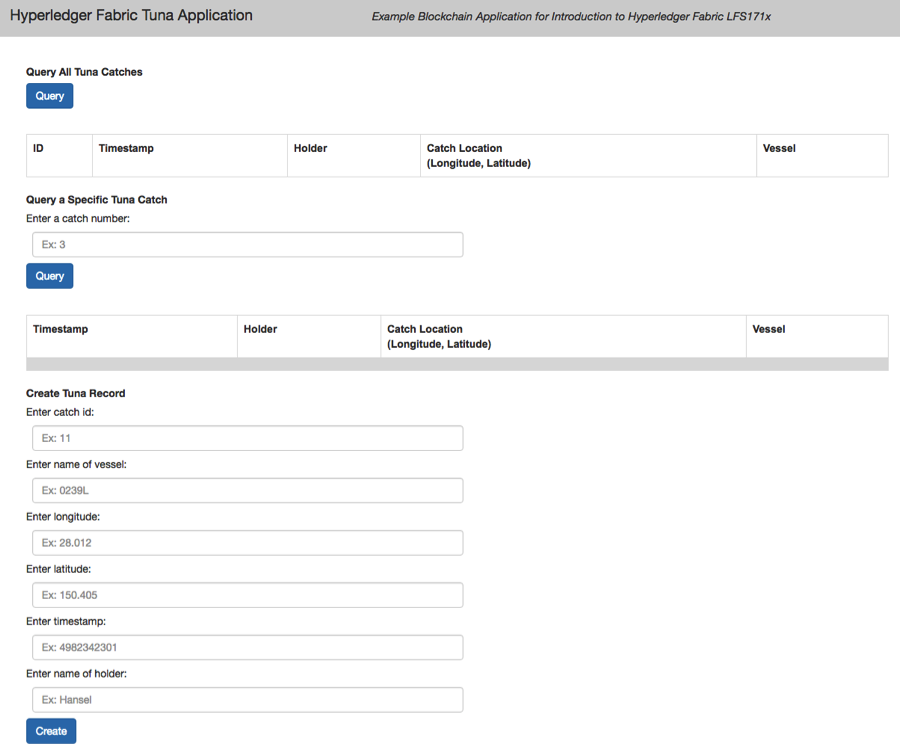
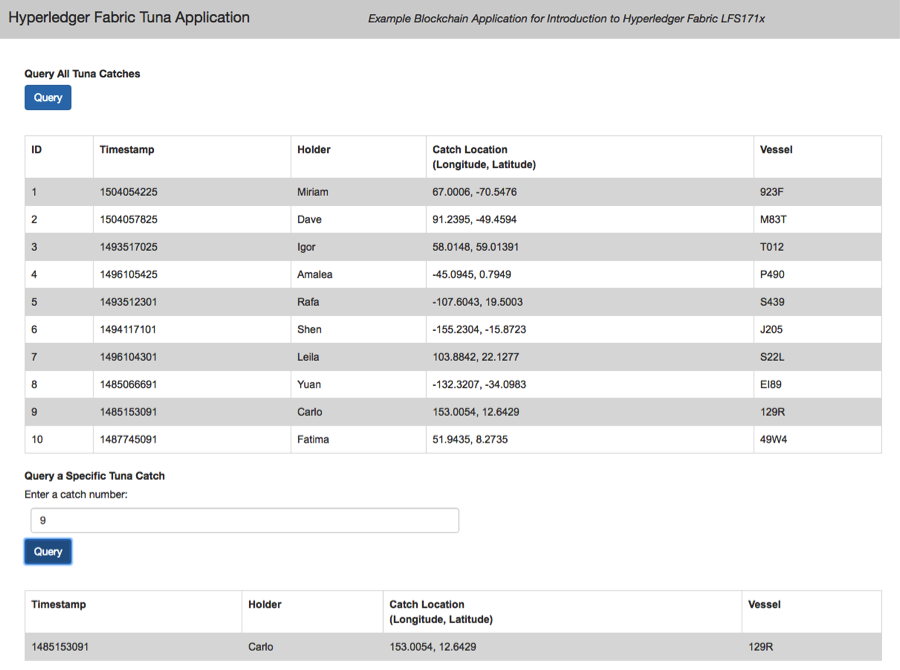
This exercise only helps to understand the Hyperledge Fabric components and the simple steps to show how we can quickly spin up and bring down a Hyperledger Fabric network using sample chaincode (chaincode_example02). You should able to modify the scripts and tweak to run other samples (like fabcar under fabric-samples directory).
 Just saw the tweet… IETF finally released the long-awaited TLS 1.3 version of the secure Web communication, considered to be the most secure protocol specification that assures high-degree of security, privacy and also faster performance compared to its predecessor TLS 1.2.

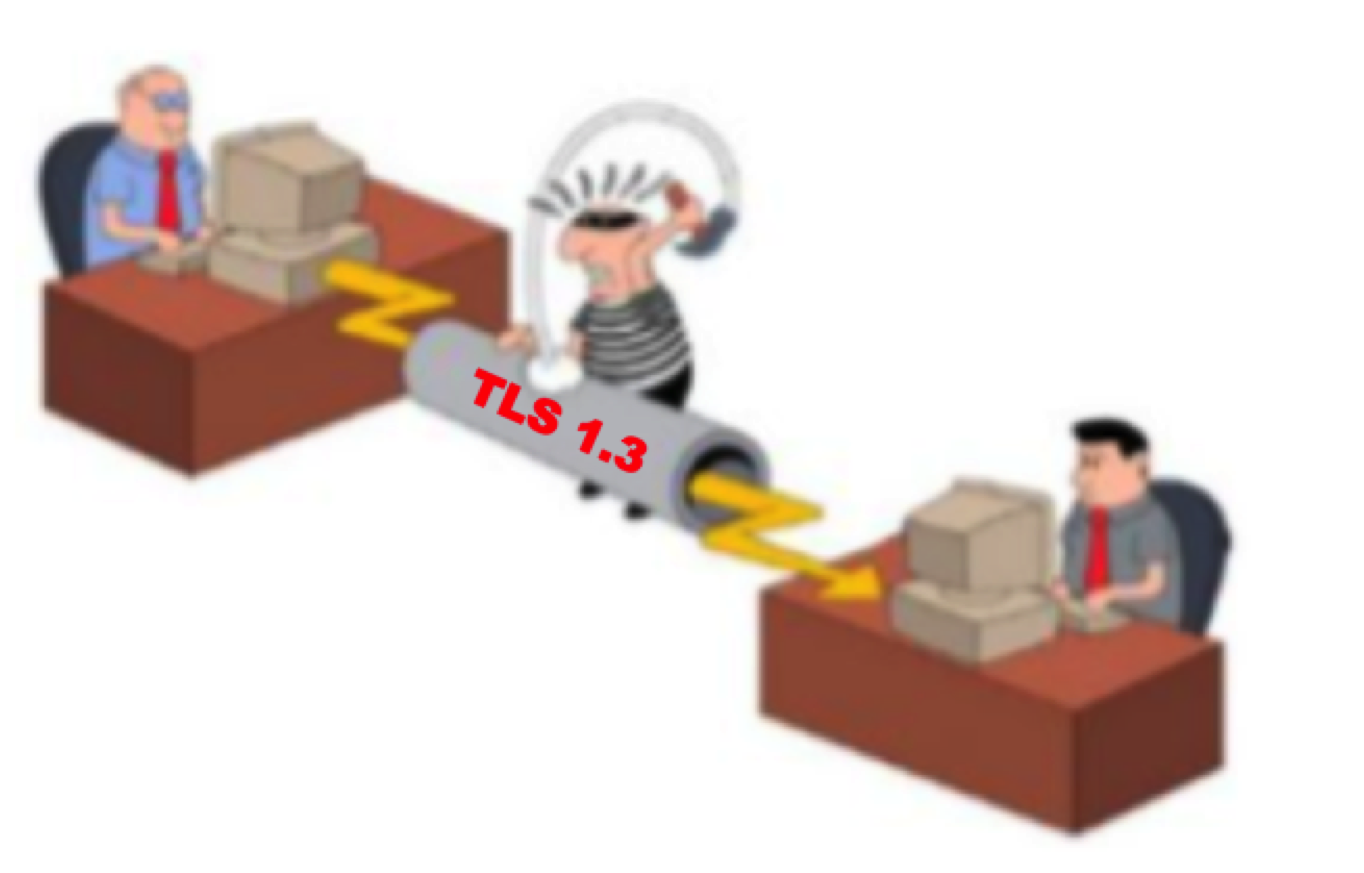 IETF finally ratified TLS 1.3 as an approved standard.